


ID card printers are designed to handle specific card materials and thicknesses. When the printer settings don’t match the cards being used, it can lead to feeding issues, misalignment, or frustrating card jams. Incorrect card thickness settings are one of the most common causes of printing problems, and fortunately, they’re usually easy to fix.
Understanding how card thickness affects your printer can help prevent downtime, reduce wasted cards, and extend the life of your equipment.
What Are Card Thickness Settings?
Most ID card printers allow users to configure the card thickness or card type within the printer driver or software. This setting tells the printer how much space to allow when feeding a card through the rollers and print path.
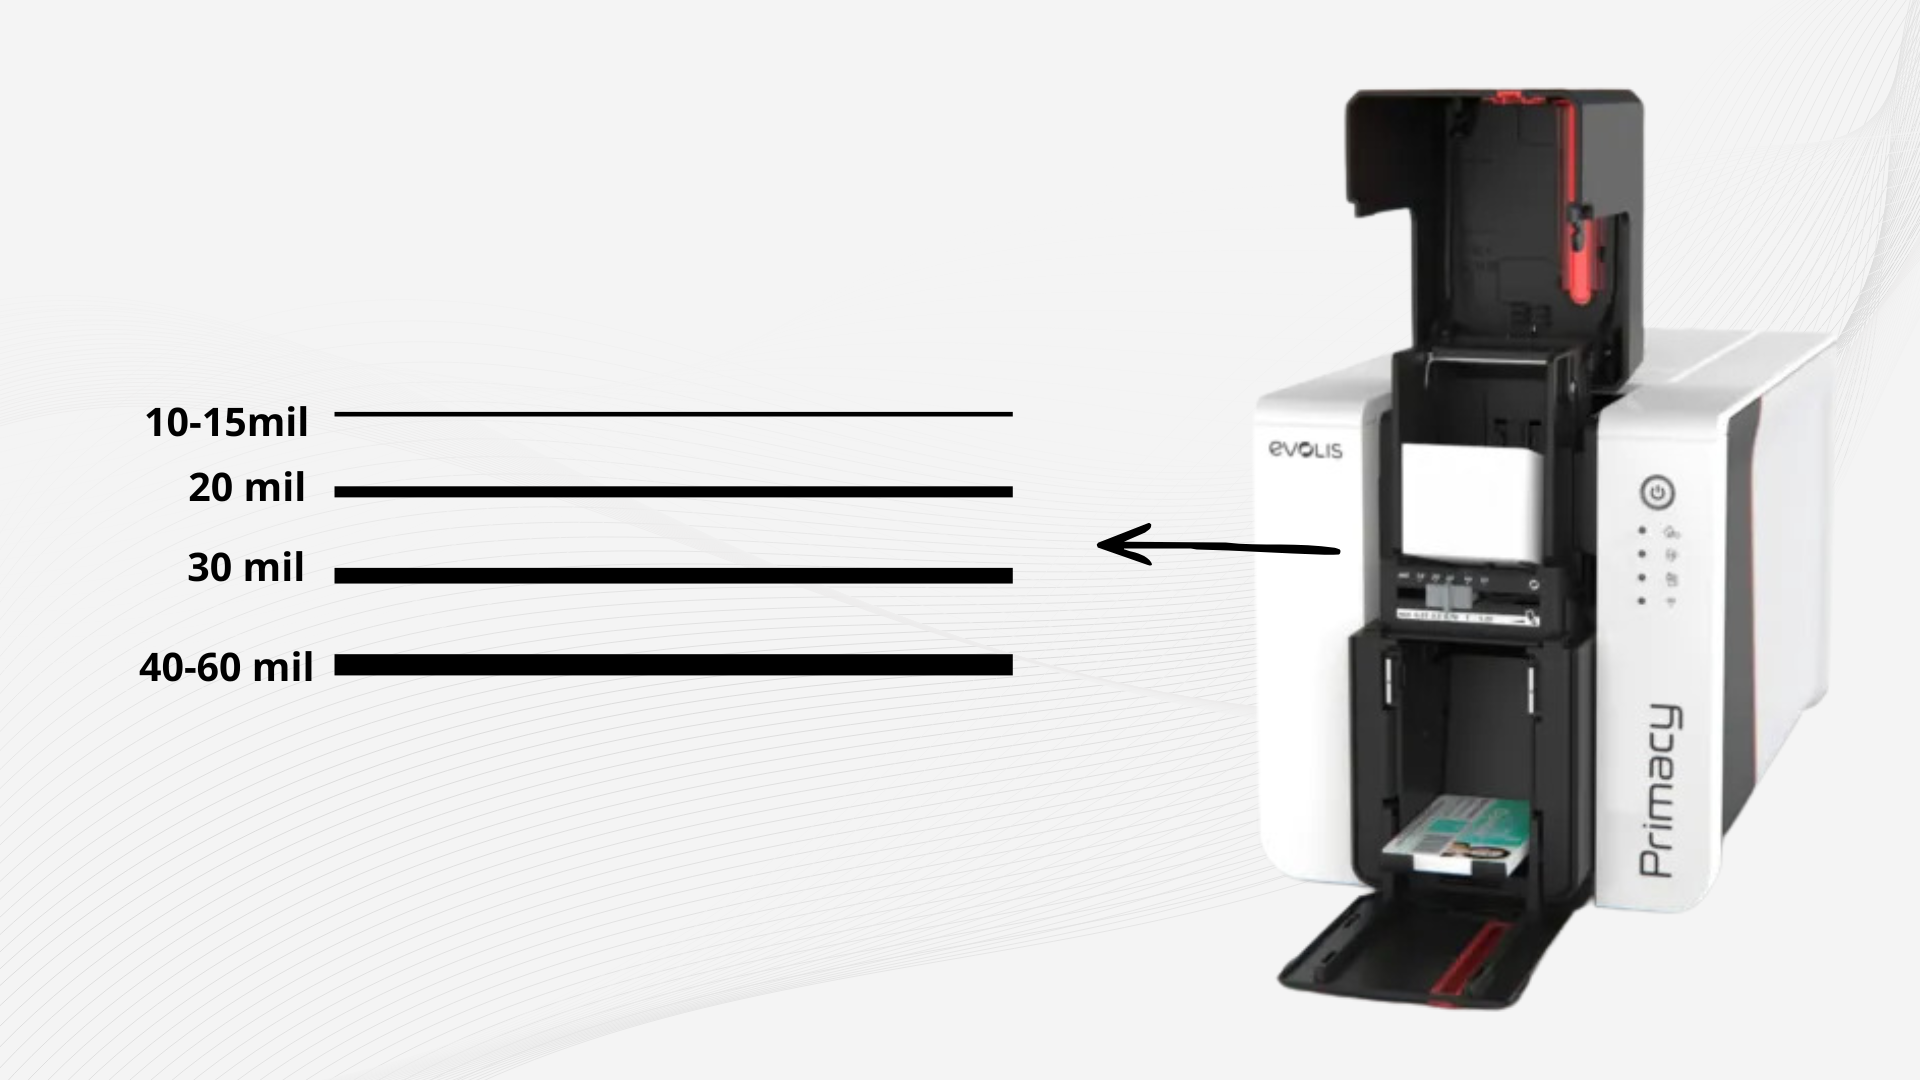
Standard PVC ID cards typically measure 30 mil (0.030 inches) thick, but cards can range from 10 mil to 60 mil depending on the application. When the printer is set for the wrong thickness, the rollers may not grip the card correctly, causing jams or feeding errors.
Manufacturers such as HID Global, Zebra Technologies, and Evolis all include adjustable thickness settings in their printer drivers to ensure smooth operation with different card types.
Depending on the printer model, the way you adjust card thickness may vary. Some ID card printers have a physical thickness adjustment dial located in or near the input hopper, allowing you to manually set the card thickness. Other printers handle this adjustment through the printer driver or software settings, where you select the card thickness digitally. Because of these differences, it’s important to check your specific printer’s documentation to determine how thickness adjustments are configured.
How Incorrect Thickness Settings Cause Card Jams
1. The Printer Cannot Grip the Card Properly
If the printer is set for a thicker card than what you’re using, the rollers may not apply enough pressure to grip the card. This can cause the card to slip, stall, or stop feeding altogether.
When the rollers lose traction, the printer may display a card feed error or simply stop printing.
2. Cards Can Get Stuck in the Feed Path
When the printer is configured for thinner cards than the ones being used, the feed path may be too tight. Thicker cards may struggle to move through the rollers and internal components.
This can result in:
- Cards stopping midway through the printer
- Cards becoming stuck inside the machine
- Multiple cards feeding at once
These issues often lead to repeated jams until the settings are corrected.
3. Misaligned Prints
Incorrect card thickness settings don’t always cause full jams. Sometimes they lead to misalignment problems, where the card moves unevenly through the printer.
This can cause:
- Images printing too high or too low
- Text being cut off
- Inconsistent print positioning
While it may not always stop the printer entirely, it can waste cards and ribbons.
4. Increased Wear on Printer Components
Using the wrong thickness setting can also put extra strain on internal components like rollers and the printhead.
Over time, this can lead to:
- Premature roller wear
- More frequent cleaning requirements
- Increased risk of printhead damage
Proper settings help ensure your printer operates within its intended specifications.
How to Check and Correct Card Thickness Settings
- Check the card specifications – Confirm the thickness of the cards you are using. Most standard ID cards are 30 mil PVC cards.
- Adjust the card thickness setting on the printer – Depending on the printer model, this adjustment may be done in one of two ways. Some ID card printers include a physical card thickness dial located in or near the input hopper, which allows you to manually set the thickness range. Other printers do not have a physical dial and instead require you to adjust the card thickness through the printer driver or software settings.
- Locate the card thickness option (if using software settings) – In printers that use digital configuration, look for settings labeled card thickness, card type, or card feed settings within the printer driver or printing preferences.
- Adjust the setting to match the card type – Select or set the correct thickness based on the card manufacturer’s specifications.
- Run a test print – Print a test card to ensure the printer feeds the card smoothly.
Other Factors That Can Contribute to Card Jams
While card thickness settings are a common cause, other factors can also contribute to feeding issues, including:
- Dirty feed rollers
- Warped or bent cards
- Using low-quality blank cards
- Improper card storage
- Worn printer components
Regular maintenance and proper supply handling can significantly reduce printing problems.
Preventing Card Jams in the Future
To keep your ID card printing process running smoothly, consider these best practices:
- Always verify the card thickness before printing
- Use high-quality blank cards designed for ID printers
- Store cards in a cool, dry environment
- Clean the printer regularly with manufacturer-recommended cleaning kits
- Check printer settings whenever you change card types
These simple steps can help prevent downtime and ensure consistent print quality.
Keep Your ID Card Printer Running Smoothly
Incorrect card thickness settings are a small configuration detail that can have a big impact on printer performance. By ensuring your printer settings match the cards you’re using, you can avoid jams, improve print quality, and extend the life of your equipment.
If your organization frequently prints ID cards, taking a few moments to verify your printer configuration can save time, reduce waste, and keep your badge printing operations running efficiently.
Need help troubleshooting your ID card printer or selecting the right cards and supplies? Our team is here to help. Contact us today to speak with an expert who can assist with printer setup, maintenance, and the right products to keep your ID card printing running smoothly.